Adding location assignments
Location Assignments will allow you to limit the work orders your Technicians can see in their work order list. When you assign a Technician to a location, they will only have access to view work orders at that location as well as work orders they have created and work orders that are directly assigned to them. If a technician also has Work Category Assignments, then they will see work orders tied to the work categories assigned to their department as well. You can manage Location Assignments through the user's account or the location's details. *Note: If the Technician has access to other sites, you have the ability to assign them locations for those sites as well. If they are not assigned to any locations for the other sites, then they will see work orders that they have created or are assigned to for all locations within those sites.
We recommend using Location Assignments to allow your Technicians to only see work that is relevant to them. This will also encourage Technicians who typically work at a particular location to complete the necessary work in a more efficient manner. While this feature is available for all user roles within the Full User type, it is designed to be used for the Technician user role.
For example: If you have one or more Technicians who are in charge of only completing work in the Administration Building, then you can assign those users to the location of Administration Building in order for them to see work orders tied to that location in their work order list. This would optimize their day to day experience by only seeing work orders that are relevant to them.
If you have questions about how to successfully utilize Location Assignments for your account, please contact Client Services.
Assigning locations to a user
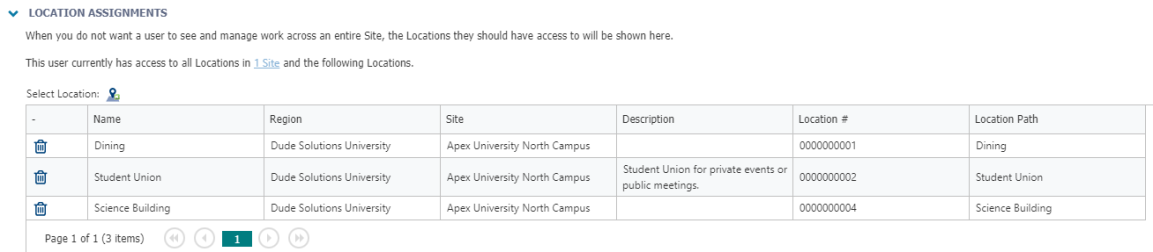
- Click on the Admin menu icon, then click on Users.
- Click on the Technician's name in the First Name column.
- Click on the Select Location icon (
 ) in the Location Assignments section.
- Select the appropriate Site from the drop down menu on the left-hand side of the window that appears.
- Check the box(es) next to the Location(s) in the Name column. *Note: You can only assign a user to a top level location.
- Click Select at the top of the window to add the Location Assignment.
- Click Save at the top of the page.
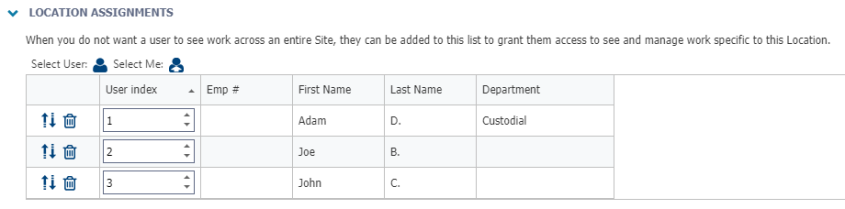
Assigning users to a location
- Click on the Assets menu, then click on Locations. *Note: You can only assign a user to a top level location.
- Click on the Location in the Name column.
- Scroll to the Location Assignments section on the page.
- To assign user(s) to this location, click the Select User icon.
- Check the box next to the appropriate user(s).
- Click Select.
- Click Save at the top of the page.